Sunday, June 30, 2013
Monday, June 24, 2013
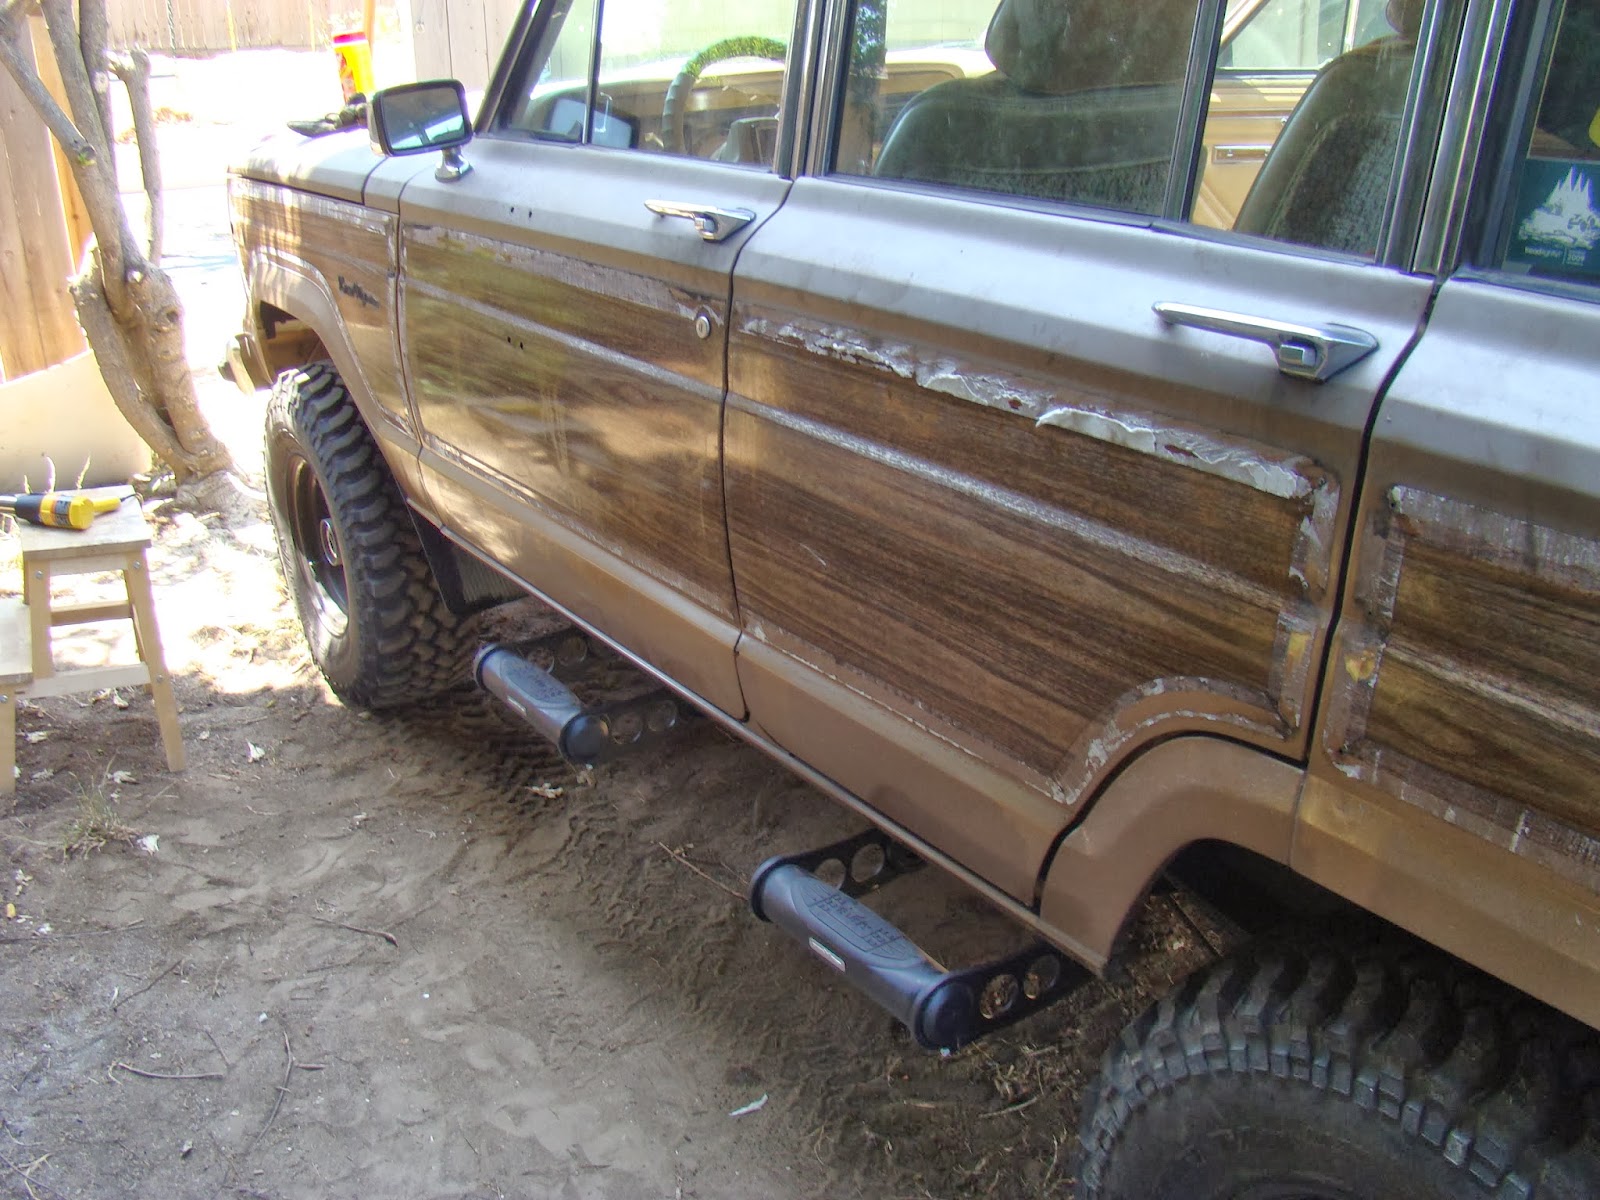
Clear coat done
TouchUp Direct (the supplier of the base coat) notes on its website that the best way to get the true factory color is to cover the base coat with a clear coat. I did not do this pre-Big Bear partly due to time and partly due to my perhaps erroneous belief that keeping the base coat as the top coat would make touch ups easier. What I didn't process at the time, I didn't process how quick and cheap it would be to paint the rig in clear coat. So I headed over to my favorite auto parts store (Amazon.com) and ordered a six pack of these:
 I did a down-and-dirty mask of the vehicle using what was left of the tape and brown paper from the base coat paint job. Honestly, if I got a little clear lacquer on any of the unmasked areas, I wasn't going to care. I had to keep telling myself that this was a $300 paint job tip to tail, base and clear and equipment, and my target was "good enough" rather than "good." Just like on all my woodworking projects (furniture, instruments, and the like), I will always see every blemish no matter how good the item looks to others.
 I thought it was going to take me all day, with several hours between coats (which is how it was when I applied nitrocellulose lacquer to an old Silvertone guitar I was restoring). But upon reading the directions, I learned that it was about ten minutes between coats. What that meant, in actuality, was constant painting. It took about one full can to do half the Jeep. I started on the left side of the hood and valance, worked my way down the side, and finished up on tailgate. I then grabbed a second can, shook it for a while, started on the tailgate, and worked my way up to the passenger side hood and valance. By the time I was done doing that, the front left was dry and I could start over again. Basically, it was an hour of constant painting, and my right index finger went numb.
Side note: as I was masking up the rig again, I just didn't feel like doing a great job on it, obviously, but I also had a revelation. If I paint the faded taillight housings, I might be able to get them to look a bit better, if not be any better. Here's what they looked like before:
 And now after. A little fresher and cleaner, which is nice.


 I am quite pleased with the color and the consistency of the clear coat. It did indeed darker just a bit and better match the original color. At times, it looked blotchy just like the base coat did, but the top coat evened out nicely. A good day's work.


Side note: as I was masking up the rig again, I just didn't feel like doing a great job on it, obviously, but I also had a revelation. If I paint the faded taillight housings, I might be able to get them to look a bit better, if not be any better. Here's what they looked like before:


Done, but not quite buttoned up yet. A few pieces to put back on.


Friday, June 21, 2013
Limped home, and needing some service
To get down the mountain, I decided to go the east route that drops down to Mentone rather than the west route to Redlands. My theory was that it was longer and flatter to go east, so I'd avoid an overheat event. I was mostly right. I made it through Big Bear City and partway up over the pass (about 7500 ft) before the temp spiked and I had to pull over into a turnout for a cooldown and refill. The family was in the Honda about ten minutes behind me getting donuts. They brought me mine and some water for the Jeep. After a bit, I said screw it and got going. Sitting was going to cool it down more slowly than getting it up to speed on a downhill slope with the water pump running. It worked all the way through Mentone and east Redlands to the 10 freeway. I was flying through some quite beautiful mountain scenery. I found Clark's path and a few others that I will want to run sometime in the future. Sometimes I just put the rig in neutral to drop the revs and let the Jeep rest. Except for one massive RV pulling a TJ when I wanted to keep cruising, it was what I had hoped it would be. Kim said I was going so fast that she couldn't catch me on the 10 unless she went 75. But she's a slow mountain driver (doesn't do it at all during ski season), so she was just being appropriately cautious.
And then I hit the fan at Mission Ave and the 91. Yuck. I pulled off and let it sit. The family and I drove to Napa to get a megafuse for the fan in case it happened to be the problem (it wasn't, but now I have a spare). Popped it in. Fan wouldn't start.
We headed out towards the 60 because the 91 is the work of the devil and it was a warm inland empire summer day. I pushed it through Norco, got onto the 91 West for home and just kept going. Somewhere on this leg the temp gauge flat out died after I tried once more the "tap it to get an accurate reading" trick. My only gauge now would be steam or fire from under the hood. I blasted up Imperial Highway to Lakeview, on to my lovely block, up the lawn and home. I opened the hood to release any heat trapped in the engine bay.
For now, the rig is at peace and where I can work on it. Tomorrow will be better.
Monday, June 17, 2013
Saturday, June 15, 2013
Reassembly
Didn't take any pics of me putting stuff back on. Not interesting. These are just the glamour shots.


Friday, June 14, 2013
Painting, Day 2 - Bedliner
The roof is one lumpy chunk of sheet metal. It's sun damaged, dented, faded, peeling, with a bit of surface rust. I removed the luggage rack runners.


I went with Herculiner, which got good reviews and wasn't terribly expensive. I'm using it to add both a bit of style and a bit of protection.

The green tape marked off the section to be lined. I wanted to follow the body line of the doors, so I just carried it into the front fascia area.


Thursday, June 13, 2013
Painting, Day 1 - Bronze
At last, with all the body prep done, I can get to the topcoat. First, yes, that is my driveway. Not a dust free environment, for sure, but I'm going on the cheap with this one.


To carry the black bedliner into other components was always the plan. I want to have the bumpers protected, as well as the aluminum and plastic grill. But first they need to be thoroughly cleaned.


Monday, June 10, 2013
Peeling the "wood" off
I had to get rid of all of the wood grain. First step was to remove the rivets holding on the outer trim.


Subscribe to:
Posts (Atom)