Sunday, February 21, 2010

Bumper rubber upgrade

Found some good rubber trim pieces on a wrecked '88 GW at the local Pick-A-Part, same one I got the fenders from, among other pieces. My five-year-old son and I pulled my Jeep's rear bumper and then got to work upgrading it. Here's what I had to start with:
Once we got it pulled, we just had to use a socket wrench to remove the screws or nuts holding the various trim bits in place. Here's the big man hard at work...
Back on and looking good.

Friday, February 19, 2010

Side marker lights

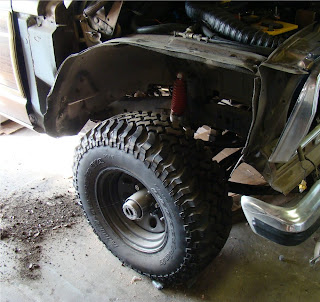
As part of the fender replacement, I had to remove the front right side marker light (which was already cracked up, dirty, and dead). Here's the gratuitous before shot:
Replacement was as easy as a call to BJ's Offroad for a new set for all four corners. I wanted, above all, to have working running lights, so I also opted for some bulbs and bulb housings. The front ones were quick and simple, with Nath helping me the whole way. The after shot, with the new fender:
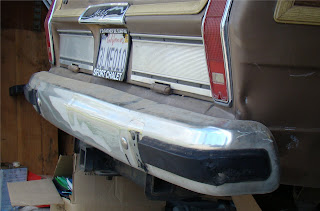
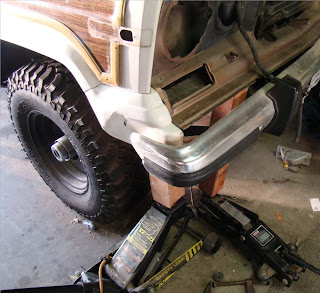
The driver's side rear marker was an entirely different matter. Here's what I had to work with, thanks to the previous owner of my rig. I'm not sure what he hit or how he tried to "repair" the damage. But it was lumpy, bumpy, and quite out of true.
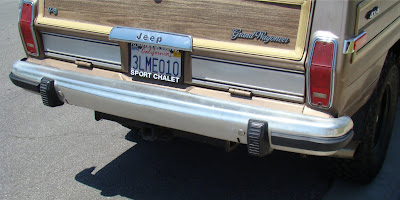
I couldn't get the new side marker housing to fit this mucked up area (the base is L-shaped, wrapping around the fender corner to get close to the taillight housing). So I had to get a little creative with my bandsaw. Basically, I cut off the part of the housing that wraps around the end and then scribed the remaining section to better fit the "unique contours" of the body panel. I then elongated the hole seen in the pic above (where the bulb base comes through the body to provide the bulb itself with juice) to allow for the more forward placement of the side marker base. After, I scrubbed the damaged portion of the fender around the taillight with a wire attachment on my drill to get rid of any paint flakes, followed by a quick spray of silver Rustoleum paint to retard future rusting of the area (I didn't have any gold in the garage, and I'm cheap). The final result:
Overall, I'm pleased. It works, it's sealed from the elements thanks to some clear silicon caulk, and it doesn't look bugly. I'll address the busted taillight housing later--for now, it lights up so I'm legal.

Saturday, February 13, 2010

New door panels and right front fender

On a trip to the local Pick-A-Part (with directions from a fellow member of the IFSJA.org), I grabbed a front right fender and some inner door panels, plus some other odds and ends like a vanity roof rack, door switches, and a headlight bezel. First, I tackled the door panels. My originals were adequate, but the PAP ones were cleaner and more structurally sound (they're not much more than a particle board/cardboard hybrid with vinyl over the top). The replacements had more clips to hold them on and weren't quite so beat up. Unfortunately, I didn't take any pics of this because I did it with the older kids. Here's a "final product" shot.
Why I'm replacing it. The previous owner must've hit something rather firmly. It wasn't a functionality issue. I just got tired of scraping my side on it as I walked through the garage. Plus, the new one was only fifty bucks at the PAP in San Bernardino.
Here's the run through. To remove it, there are about seventeen bolts (give or take). Six or so along the top, four between the passenger door and the body (very awkward to get to), two on and two in front of the rocker panel, and three behind the headlight and signal light up where the fender meets the front valance. Plus one on a metal rod that holds rigid the lower front portion of the fender just in front of the tire.
A pic of it off. That pile of dirt and leaves to the left of/behind the tire (notice the clean floor in the above pic) was trapped up in the fender well. No rust though, which is nice. California car.
Putting the new one on was a bit of a challenge. The biggest bite was trying to get the front valance forward enough to meet up with the newer fender. I tried heat, hammers, and a pair of floor jacks and some 4"x4" cutoffs, but I couldn't get it done. C'est la vie. While I was in there, I took care of the new headlight bezel, as well. But that's another post.
Here's the final result. I put back most of the bolts, leaving off one inside the door jamb. A little black RTV between the fender and the body at the door jamb helped keep things water tight in the cabin.