Sunday, April 5, 2009

Fuel system issues

Finally got a few improvements made on the Jeep's fuel system. First, I felt like the fuel pump wasn't working as well as I liked, and it's a part to replace with something new, so I popped the old one off and got a new one.

Here's the old one.


And the new one.


I also added a glass/clear fuel filter between the fuel pump and the carb so that I can tell if a starting problem is at all related to not enough (or no fuel at all) getting to the carb or possibly fuel pump failure/under-performance. You'll notice, as well, that I retained the stock filter (the mini-beer keg on the left in the photo at right). It has a return line that is key for avoiding excess fuel flooding the carb. I think it also has some control over vapor lock, but I'm not positive on that.

I also added one before the fuel filter down below. I took a tip from someone on IFSJA.org to cover the lower glass filter in insulation and zip-ties to keep it protected from flying debris. Again, this will allow me to see fuel flow issues that occur before the pump. Needless to say, with three fuel filters now instead of one, the fuel will be mighty clean in the engine.

While I was at it, I replaced the rubber fuel lines in the engine bay and below to get rid of some dry/cracking lines that were a potential fire hazard.


Tuesday, February 24, 2009

Ignition Improvements

Due to some starting issues (too much time to crank over, in particular) , I've turned my attention to the ignition system. I've already replaced the starter motor, which helped. Now I've popped out the old ignition coil--which looked ancient--and threw in an Accel Super Stock coil. That didn't quite solve the problem, though it was a smart upgrade. So then came a new ignition module. Both of these were quick and easy, just a few screws and a couple electrical connections. The Jeep is starting better as a result.

Up next, spark plugs. I went with E3 Diamond Fire spark plugs, which are ridiculously expensive compared to standard Bosch plugs but promise a more complete combustion cycle for (albeit modestly) improved power and mileage. I'm hoping for just more consistent spark and somewhat smoother running engine, and the extra forty bucks to get that is worth it. I will gladly pay for peace of mind. Here's how the plugs went it.

Sunday, February 8, 2009

Body lift kit installation

I wanted a bit more clearance for my 32" BFG's (trying to squeeze as much tire in there as I can without rubbing or going to a 6" lift and getting tipsy). The easiest way, without making the Jeep even more top heavy, is to install a body lift kit. At the same time, I wanted to pop in some new polyurethane body bushings to absorb road vibrations and quiet the cabin a titch. All of this will get the body an inch or more up in the air and above the tires while keeping the weight (engine, tranny, frame rails) where they'd be for a four inch lift.
First I had to pop off the bumpers so that the front and rear sheet metal doesn't get caught on the upper lip of the bumpers themselves.
Here's a peek at the original condition of the body bushings before removal and replacement.
Side by side, the new and old bushings plus the "hockey puck" lifts.
Once the original bolts are taken off (no mean feat if you look at the rust on the sample in the pic above), it's a matter of jacking up the body off the frame. I used my Hi-Lift and some scrap oak for this. You need just about a half inch more clearance than you think to get the new body bushing's center metal tube in the alignment hole in the body itself.
Several of the holes needed to be expanded just a bit to allow the new bushings from BJ's to fit tightly. The only decent tool to use was a Dremel with a grinding stone attachment.
A shot of a new mount and body lift puck in place.
Here's a backside shot of the Jeep with the left bushings and lift pucks in and the right still on the old, crusty stock bushings.
Side by side comparison of the passenger's side rear fender clearance (L) and the driver's rear fender clearance with the new lift pucks and bushings (R). Obviously I've gained more than just the 1" over stock that the body lift was expected to give, thanks of course to the new, firm poly bushings.


Unfortunately, I don't have any pics of the completed body lift on the rig. Oh well.

Sunday, February 1, 2009

Hood Latch Fix


When I bought the Jeep, it had some crinkled fenders from a front right and a back left collision. I wasn't looking for pretty, so that was no big deal. However, the front right crunch pushed the bottom of the front clip back a bit on the right, causing a few minor consequences that I've had to work around or accommodate. The main irritant was that the right interior spring hood latch would not fully release because it didn't quite align with the catch on the underside of the hood. In essence, the spring latch was angle slightly forward because of the impact on the front right fender. It would then push against the catch mechanism on the underside of the hood, turning a one person job into a two-person job. After pulling the hood release myself, I'd have a family member pull on the hood release by the driver's left knee as second time to pop it as I pulled it up from the forward lip. Not fun. Other times, when alone, I'd cram a large screwdriver or allen wrench into the gap between the hood and the grill to put tension on the latch and to force the hood up. Then I'd pull the release handle from inside the cab to pop it. Again, not fun.

My initial fix was to remove the right spring-loaded latch release itself so that only the left latch held the hood in place. [The left spring hood latch is shown in the lower half of the image at right: it's the black spring topped by a cone .] Since I wasn't driving this thing much yet, it was fine. But after a few short highway trips and the drive to El Mirage and back, I noticed a slight up and down vibration of the front right corner of the hood. I wasn't particularly worried that the hood would release and be folded back into the windshield by the force of the wind, but why take chances? Since I couldn't repair the front fender to get the spring latch to be in alignment, I would have to find an alternative to latching the hood securely.

I decided to go with a pair of black YJ/TJ/Wrangler-style hood catches that are synonymous with the smaller softop Jeeps. I ordered a set from Rugged Ridge. Unfortunately, the fitment wasn't right. The wood grain trim on my Jeep's front fenders were in the way, and I was not in the mood to cut them only to find out later that these hood catches still wouldn't work. So I sent them back and bought a pair of black CJ-3/5 T-style hood latches from Quadratec. Happily, I was able to get these to work and look good in the process. Here's how I did it with my son, who rocks the tools.

After placing them in various spots along the front and sides of the hood, I settled on the section of the hood that raises up a little over an inch towards the center of the front grill. With the best helper in the world, I mocked up the placement of the latches and marked the holes with a pencil. Then I removed the grill (six bolts on top, three screws on bottom), drilling holes in the metal frame of the grill. I bolted in the latches with the supplied hardware. I then put the grill back on so that I could line up the hooks that the T-latches grab to hold the hood down. What I wanted to avoid was drilling into the hood itself until I had great confidence this would work. Once the latches were on the grill and the grill on the Jeep, I felt it was going to happen. After drilling, I used some longer black screws with blue Loctite and a pair of lock washers to hold the catch in place. Here's the final product. I'm quite pleased with how the project turned out. I know there are some FSJ people out there who will think it's blasphemy to put "little Jeep" parts on a full-size Jeep, but so it goes.

Monday, January 12, 2009

Smog certification and fuel sending unit

Back in November, I took the Jeep to Tire Guys in Redlands for a California smog inspection and emissions certificate, required for the title transfer for the DMV. The first time through the inspection, it passed everything except the evaporation test, which is all about finding unwanted vapor emissions. The master tech working on the Jeep, Mike, was very helpful in identifying where the leaks were coming from (a few cracked fuel lines, as well as the round hatch area above the fuel sending unit that sits above the gas tank). In my list of things I don't want to work on I put fuel lines near the top. I let them handle the bad fuel hoses, but the cost for them to replace the O-ring around the unit was a bit high (and it was mostly labor). Since the fuel gauge was inconsistent in its functioning and unreliable in its readings, I figured I could replace the sending unit, fuel lines, and the O-ring for less than what the Tire Guys would charge me. So I placed a call to BJ's Off Road for a new sending unit, a new O-ring, and a new plastic hex nut (2 1/4" wide, holds the sending unit in place). Mike had popped the rivets off the sending unit access hatch for me and showed me where the hatch was (underneath the bench seat). The Tire Guys were perfectly happy to let me do the work instead of them. Mike even said that he would do a free evap test first when I brought the Jeep back for a smog retest to make sure I took care of the problem. I was able to replace the unit and put in a new O-ring. I also replaced about three feet of fuel hose running to and from the sending unit along the top of the gas tank under the back of the Jeep, all for about sixty bucks, just over a third of the Tire Guys' estimate (which is not a criticism of the Tire Guys shop or pricing). Since they were on top of the gas tank, I didn't have to worry about fuel pouring out when I replaced the lines. All that spilled out was what little had remained in the lines due to surface tension. The only frustrating or time-consuming part of the process was removing the ends of the fuel hoses from the steel hard lines behind the gas tank above the rear axle. This is where several lines, including brake lines, converge and tuck in the left frame rail, making for a crowded area that my big hands don't exactly fit. I was able to do it, but not before giving a few DNA samples from my knuckles.

My fuel gauge is now much more reliable, I don't have any of the crusty, cracking fuel hose that is always dangerous, and I have a smog certified Jeep. A good round of work overall.

Sunday, January 11, 2009

Vacuum leak issues and our 1/10 Trip to El Mirage OHV for some off-roading

Well, I've been so busy I wasn't able to post much. First, I was stuck hunting for a vacuum leak. The black coconut in the pic below is a vacuum reservoir, and with that lovely hose in my hand connected to nothing, I was without vacuum for the transfer case (and the heater blower), so shifting into four wheel drive wasn't happening. For some reason, the engineers who designed these Jeeps LOVED vacuum controls (pre-CPU) for a variety of different mechanical processes. I spent at least five hours under the hood over various days, plus time on the computer searching IFSJA.org, for the answer to this problem, but eventually it triggered my time vs. money switch. So I called 4West, a local 4x4/Jeep sales and service center, for some help. As this is not a Wrangler/CJ type Jeep, it wasn't in 4West's domain, so I was sent to Veldman's in Rialto (which is a Porsche/Mercedes shop). The owner, Bill Veldman, drives an '87 Grand Wagoneer down from his home in Lake Arrowhead, so he is quite familiar with these machines. After charging me way less than I figured, he had it hooked up and running (and he replaced the fuel hoses to and away from the fuel filter, which were leaking). Nice guy, great service.


So here it is: a reasonable four inches of spring lift, 32"x11.50" BF Goodrich T/A KM tires. They're just a bit too big for a four inch lift alone, causing some rubbing up in the fender wells at points of higher axle articulation. I don't want to cut the sheet metal for tire clearance, so the 1" body lift will be the way to go getting me the same tire/fender clearance as a six-inch lift with less of an increase in the Jeep's center of gravity. Yesterday, we drove an hour north to the El Mirage Dry Lake OHV Recreational Area. Though fenced in, El Mirage is a wide open section of the Mojave Desert centered around the dry lake bed, which is enjoyed by land-yachts, model rocketry builders, and drivers interested in testing their vehicles' top speed. On this particular day, due to heavy rains earlier in the week, the lake bed was closed to all activities. But there are still 20,000+ acres of wide open trails for quads, bikes, and 4x4s. Most of the activities on this day were dirt bikes and quads; I think we were one of three or four 4x4's in the area. We explored the east trail loop for about two hours, getting out a few times to hike around in a dry river bed and up to a nearby peak to look out over the lake bed (and to scout our trail back to the visitor's center and exit). It performed quite well, though the ride was a bit stiff (which is to be expected until we can break the leaf springs in on a few more trails)--the kids described it as riding around on a trampoline. Happily, everything was right at normal the entire time, from engine temperature to oil pressure. I kept it in 4WD High the entire time, just shifting the transmission into L (1st gear) to keep it manageable. Most of the time, we didn't get above ten miles per hour. Occasionally I took us on some narrow trails that might have been better navigated by a quad than an FSJ (and the Jeep has the scratches to prove it), and there was one point where the novice off-road enthusiast in me thought we might roll over (grossly exaggerated fear, I now understand). Twice, my wonderful wife got out and found a good spot for some pictures of the Jeep, which I happily post here. We worked our way around the East Trail Loop behind some mountains before heading home.


Saturday, December 6, 2008

New rear differential seals and fluid

This one was fun and productive. My rear differential was leaking at the base of the cover, and rather than simply topping the diff off with fresh fluid, I wanted to change the seal and get rid of most of the junk gear oil in there. I pulled the cover off the rear differential. Leaving the top two bolts in, I popped the cover and drained the old, nasty fluid out. It smelled rather burned/carbonized, but the ring gear wasn't chewed up and there were essentially no shavings in the drained fluid.

I then cleaned out the gears with some shop towels, wiping out as much of the old gear oil as I could. I think, overall, it went well. As part of this process, I also cleaned the flanged on the differential housing with a 1" chisel (gently, as not to gouge the housing in any way). It had a thin, crusty layer of RTV on it, as well as an old gasket saturated in certain spots where it was leaking (near the bottom). My primary concern was to get a good, smooth flange. I was considering using some sandpaper but thought better of it. In hindsight, I should have used a small level to check how true the differential housing was.

Afterwards, I turned my attention to the cover, which needed to be wiped clean of the old fluid and bits of RTV and gasket. I scraped its flange smooth, using WD40 in small doses to loosen the built up RTV. I also used a file to remove small nicks in the leading/outer edge of the flange on the cover. I assumed some were there from the previous owner hitting the occasional object while four-wheeling. All in all, it took about fifteen minutes. I just sat on my driveway, scraping and filing away. I then put on some new RTV sealant, followed by the new gasket. Once I was finished with this, it was put back on the Jeep and filled with Lucas Oil's gear oil for limited slip differentials (which apparently is different than regular gear oil).


________________________________________________

I then had to turn my attention to the pinion seal where the pinion comes out of the differential to meet up with the yoke where the rear drive shaft attaches. As you can see in the pic at left, oil and grime cover the bottom half of the differential but there's almost none on the drive shaft itself. This a typical sign of a bad pinion seal. The oil leaks out here and thenis blown back onto the differential housing by the wind flowing underneath the Jeep. At first I was worried that there was too much slop or play in the pinion shaft, which would beat up the pinion seal and lead to a leak, even if I put in a new seal. Luckily, that was not the case. First, I had to remove the drive shaft from the yoke, for obvious reasons. This was easy. I want to lube up the U-joint anyway, so popping off the drive shaft gave me the opportunity to clean up that joint area a bit.

The only real pain in this process was removing the U-joint from the pinion shaft. There's a large nut down the center of the joint which holds it onto the pinion shaft (you can see the hint of a nut in the above pic and the threads in the pic at left). It is a compression fit (the shaft gets wider as it moves down into the differential), so as the nut is tightened (to 200 ft-lbs.), the U-joint is pressed down onto the shaft. Even after the nut was removed, it was as if I hadn't taken it off yet. I used AutoZone's tool loan program to get a five-ton puller. Eventually, it popped off, but not until I'd put a great deal of strain on it. I was afraid the thing would blow up in my face as the pitman-arm puller did early in my Jeep work. It didn't.

Now I got to pull the old seal, which was a mess (see right), and then put in the new one. Putting everything back together was fairly easy. The only issue, if you can call it one, was getting that nut tightened back to 200 ft-lbs. I have a very good torque wrench that goes up to 250 ft-lbs., but I couldn't get the dang thing to "click" at 200. I read on IFSJA.org that 200 ft-lbs. really means "as tight as humanely possible." Lying under the Jeep, both hands on the torque wrench above me, slightly above horizontal, I was lifting my large frame off the ground, pulling with all that I had in me at this point. I'd put thread locking fluid on it, so I'm quite confident it won't back out on me. It hasn't yet. In the end, the seal remains clean to this day, and I'm happy with what I got done.


Headlights and rear cargo area

Not having driven the Jeep at night much, I hadn't noticed that I had a popeye situation, so I ordered a pair of headlights from Amazon and put them in. But as I have mentioned before, the previous owner had hit something with the front right, crumpling the fender a little bit. Once I dug into the headlight housing area, I found out that the adjuster screw/bracketry for the right headlight was gone, having snapped off no doubt during impact. As a result, I couldn't get the headlight to point directly forward. Instead, it drooped down. Since the power to the headlights is already weak because the car is working with twenty-year-old technology (some IFSJA guys go so far as to upgrade the electrical system--fuse, wiring, housing--for the headlights to accommodate high-powered halogen bulbs), I need this thing to point as straight forward as I can get it. So I built a small "adjustable" bracket with what is called plumber's tape. One screw goes in the headlight mounting ring. The other is in the body of the car. The plumber's tape is bent into a Z shape between them. I can compress or expand the Z as needed to get the headlight to point where I want it to go. Not a fancy solution, but it worked. I used the same tape to create little brackets to hold the emergency brake cable up out of the way along the frame rails (since I had to have them ride lower due to the tension increase that resulted from the lift kit).

I also mounted my hi-lift jack on the rear fender wells in the cargo area. I liked this spot for several reasons. First, I wanted it in the Jeep rather than on the front or rear bumpers or even the hood, as is common for the CJ/Wrangler style Jeeps. Second, I didn't want it or its brackets to take up cargo space on the bed of the Jeep. Third, I wanted it below the back of the bench seat to avoid my kids banging their heads/hands/teeth/elbows on it. I hang the jack accessories bag from the jack itself to keep it from moving around, as well. A good setup, all in all. At some point I want to get the rear bumper with swing out spare tire carrier from BJ's, but that is not in the budget for the next six or seven months, so tucking it under the jack works well. I also plan to get a three point strap that will mount to rings in the bed of the Jeep to hold the tire firmly in place. This'll be a good solution so that when I get the new bumper, I'll be able to use the strap and mounting rings to hold other cargo in place (like camping or day trip gear, perhaps).

Tuesday, October 21, 2008

The brakes are done, plus some other stuff for the engine

At last, I have brakes. But I wasn't able to complete the job myself due to the leak where the main hard line met the extended brake hose that drops down from the body frame to the left side of the rear axle. I was able to bleed the right rear drum with the help of my wife, but once I did so, any pressure on the brake pedal caused a leak at the hard line/brake hose connection. I flanged the hard line above the axle four times, but the leak would not go away. So I called Triple A, had the Jeep towed to Brake Masters in Redlands, and paid a chunk of money for the shop to get them to work. In the end, I didn't want to doubt their efficacy with the kids in the car. Money well spent.

Turns out, the extended brake hose that came with my BJ's 4" lift kit was no good. (I don't blame BJ's in any way--their products are consistently excellent, as are their prices--but I'll send them a heads up email in case I'm not the only one who's had a problem with the hose.) Besides, that leak wasn't the only problem with the Jeep's brake system. I had damaged the front right hard line when I installed the extended brake hose. Though I was able to flange that line, my fix didn't fix it. So it goes. Brake Masters also threw on a new master cylinder (no charge, happily) because the seals were damaged by the massive leak from the rear brake hose. In addition, the emergency brake hardware and the brake cylinders in the rear drums were broken and had to be replaced. The cylinders were probably damaged quite some time ago because, in spite of the ridiculously worn out front brake pads (1/16" left) which I replaced, the rear brake shoes still have 80% left.

With an effective e-brake at last, the new calipers and pads up front, and the new cylinders on largely unused shoes in the rear, I'm happy with what I have. After picking up the Jeep from the brake shop, I tooled around Redlands industrial parks for a while, bedding in the front brake pads. This involves getting up to about 60mph and applying the brakes firmly until the Jeep slows to about 10mph, at which point I drive it back up to 60 or so and repeat the process. By heating up the brake pads and the rotors, in effect I'm forcing the pads to transfer some of their material to the rotors. The trick, so I've read, is not to stop completely during the process (if at all possible) so that the pad material is transfered evenly. This allows for two methods of braking in the front, friction/pressure (the pads pushing against the rotors) and chemical (the pads bonding temporarily with the transfered pad material). I think I did it correctly--it does stop, which (for a 20 year old car) is nice. I'll do a second bedding in process later this week or over the weekend.

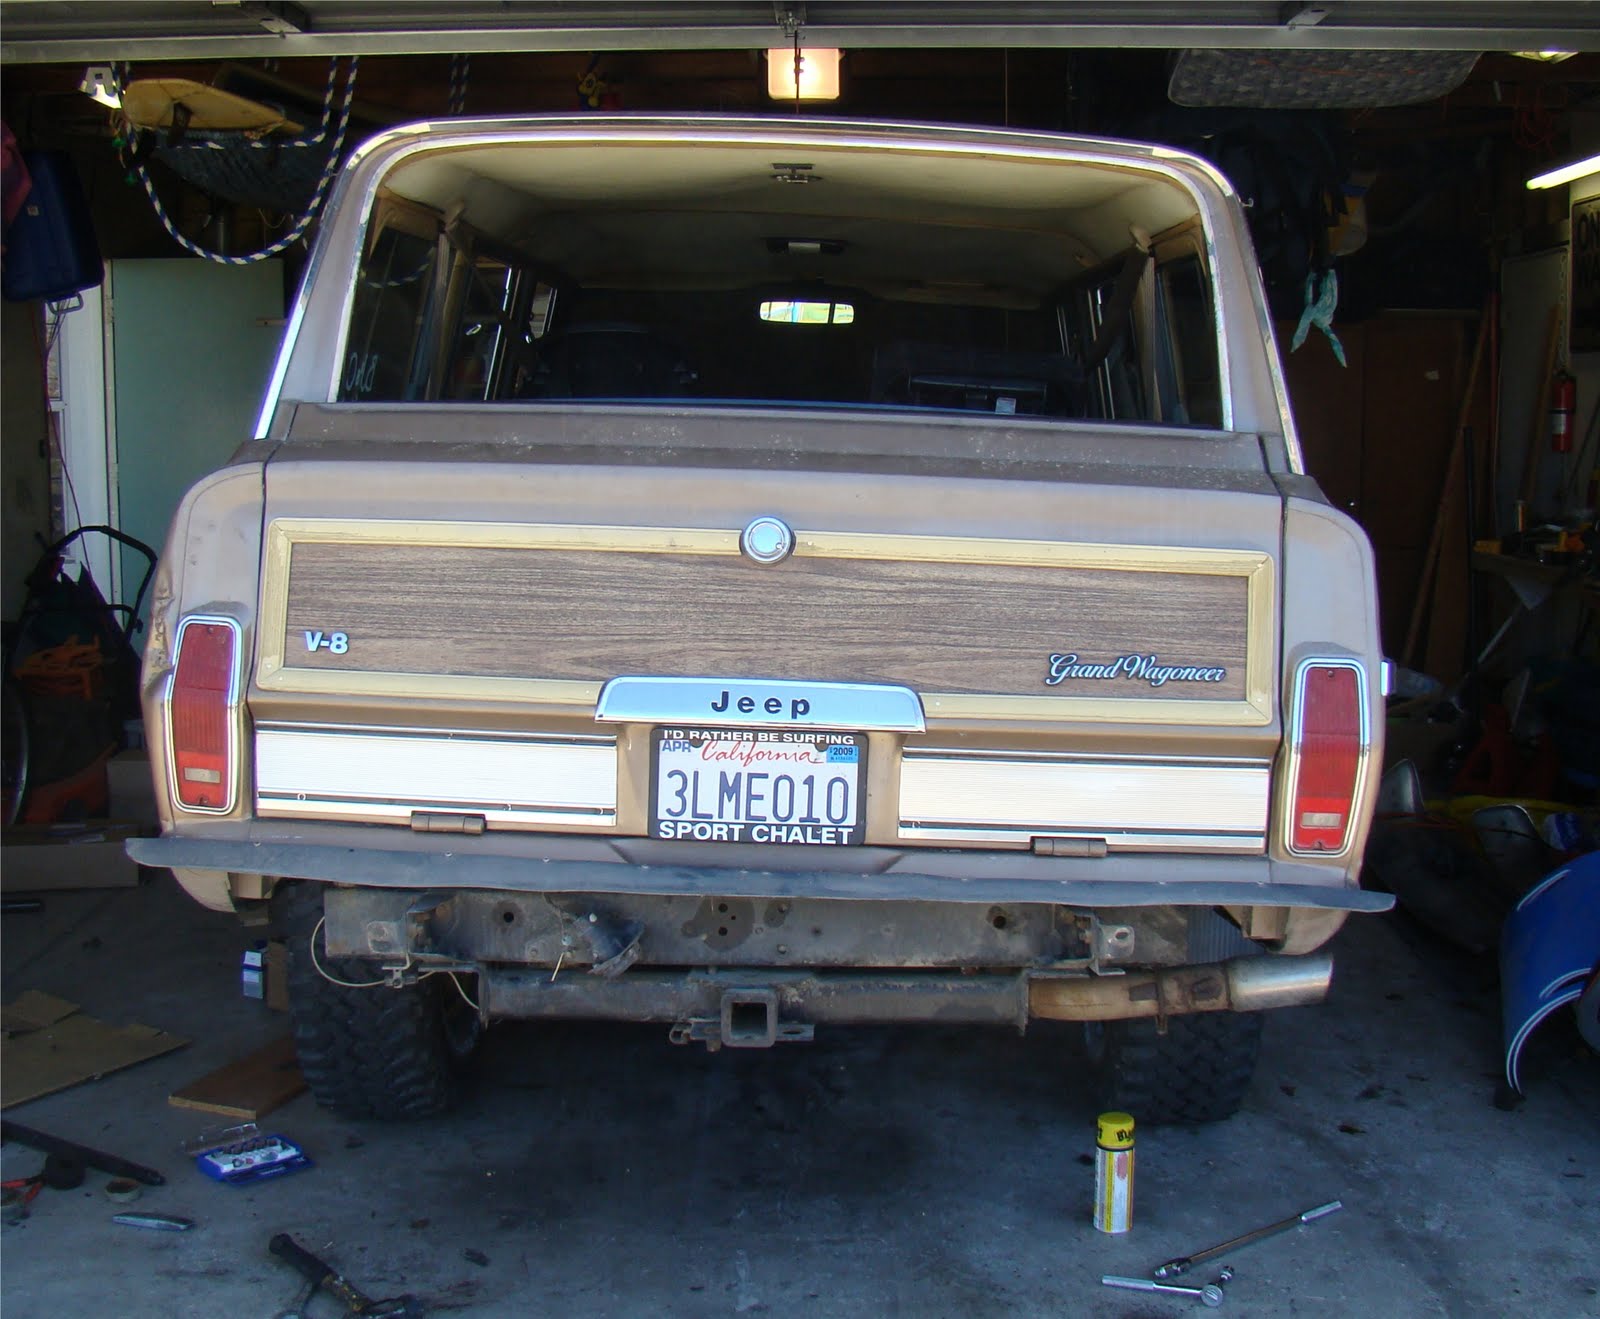
Here's a pic of it after I got home from the brake shop. This shows the 4" lift, especially in comparison to the picture at the bottom of the blog (in the first entry from August). It looks a bit silly like this, to be honest, but the new tires are on the Jeep and these old ones will be on Craig's List soon enough.
__________________________________________________________________

In addition to getting the brakes taken care of, I've added in a new starter to get this thing operating correctly. The old one was shot. I got a used one from Scotty's for fifty bucks, but they gave me the wrong one (I think it's for an '87 GW, not an '88). They swore to me it was the right one, but alas. I waited too long to take it back, so I ended up buying a remanufactured one from Kragen for less than a hundred. It works quite well and was easy to hook up. I also discovered, in this process, that the previous start was only held on with one bolt instead of two. Either the previous owner or a bad mechanic is responsible for this nifty little revelation. I've rectified the problem, all for about five minutes of time and a few bucks for a grade 8 bolt of the right size. I returned the old starter to Kragen to get my thirty dollar core charge back.

I also added an air intake hose from the air filter/cleaner housing above the carbuerator to a extruded flange behind the front grill. Rather than sucking in 200* air from the engine compartment, I now get the much denser and colder air from in front of the Jeep. Considering this thing is as aerodynamic as a shoe box, I might as well take advantage of all that air pressing against the grill. The difference in idle, running temperature, and horsepower is noticeable. I can say this with confidence because the intake hose kept falling off the filter housing, and I knew it had done so because the engine ran much more roughly. To solve this problem, I used some thin wire to afix the hose to the housing securely.

In addition to the air intake hose, I threw in an Optima yellow-top battery to give this thing enough power. Eventually, I'm going to have KC lights and a pre-runner bumper, plus a portable air compressor in the back, so I want to have enough juice to run those things without necessarily having to put a heavier load on the engine. Some day I may even have a winch, which would make the Optima all but mandatory.

Sunday, October 5, 2008

Track bar extension brackets

The rear track bar was a pain, requiring much more 'persuasion' with a hammer and a blowtorch than I expected. You can see in the picture on the right that the top part of the bracket is slightly charred. That's from heating it to soften it so that I could pry it open and create enough space to fit the track bar end. The problem is that the bracket extension is designed to fit (just barely) in the original bracket on the axle. When I installed it on the axle, it was squeezed somewhat closed because of the snugness of the fit, leaving little room for the track bar end. The other issue that made the installation difficult was camber. The rear axle, as a result of the lift kit, is tilted slightly farther back, which causes a 10-15 degree misalignment between the end of the track bar and the extension bracket. As a result, once the bracket extension is installed, the track bar doesn't want to go in there anymore. Initially, I gave up, having read in multiple places that the track bar was a Chrysler add-on after the acquisition in late '87 or early '88. FSJ's for decades have gone without them. But being a safety nut and a guy with two wonderful little kids who deserve to grow up in to nightmarish teenageres, I really wanted to get it back on. So, a hammer, a blowtorch, and a few choice blue words later, it fits. Please note: the gas tank is above the left side of the rear axle. Ergo, no, I didn't blow torch this thing while it was on the car. I did it over a patch of crabgrass on my front lawn with a fire extinguisher nearby. As I said, safety nut.

The front was significantly easier, but I still got to use the blowtorch. This time, it wasn't the bracket itself that was the problem. What was troublesome with the front track bar was the axle end link bushing. Whether it was installed incorrectly at the factory (which is my bet) or by a previous owner, it was offset by over a quarter of an inch. As you can see in the picture at right, the crush sleeve (the steel tube in the center of the track bar end which the bolt slides through) is correctly mounted, but the bushing is "sunk" in (and bulging out the other side significantly), leaving one of the track bar's steel edges to rub against the original bracket on the axle. As a result, it was heavily scored (the lower left portion of the track bar end is shiny because it has been rubbed raw, for lack of a better phrase). The bushing is vulcanized during insertion and fitted with an outer metal sleeve, both of which make it harder to press out the bushing (go here for more specific instructions). By burning it, I was able to melt the vulcanization and push out the crush sleeve and bushing. The new polyurethane bushing is in, and the track bar is on: